Posts

A Partial Fail

Image
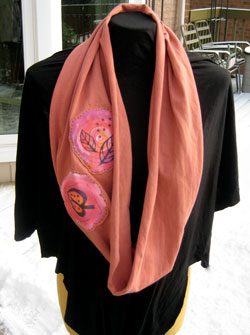
I've started to put some of those painted and stamped elements from earlier this month into use. My first application has been a partial fail. This infinity scarf (made from a recycled t shirt) with painted motifs appliqued looks nice and is quite comfortable to wear, but it is a fail in terms of the stiffness of the motifs. The jersey absorbed too much of the fabric paint and therefore the 'hand' of these appliqued elements is much stiffer than the main body of the scarf. It's not a  total  fail. It looks OK, the colours are good and it's actually quite nice to wear. I like the obvious hand stitching around the appliqued pieces. It's just that stiffness. Sigh. I need to go back to the printing and painting station in the basement and have another go - this time with a lighter approach when working on this kind of fabric. On the bright side: One thing is clear here... how much better, more consistent,  my hand sewing has become. I'm inspir...

Scary Sewing

Image
Last week I made my first garment of the new year. I'm calling it my Ladder Tunic. The design and drafting of the pattern went well. The fabric was entirely appropriate. My sewing machine and serger behaved impeccably. I only had to rip out one short bit of sewing. I discovered a wonderful new sewing tool. And I think the final product has worked out very well. So what was so scary? Well, the design in my head required me to mostly finish this top and then cut it up! WTF? After doing some texture samples on jersey last month, I knew I wanted to try out some of those techniques on wearables. And the one I wanted to use first was slashing to create a distressed fabric. Pattern: I used a self drafted pattern. This is a long, loose tunic with dropped shoulders, an asymmetrical hem and a double neck treatment. This has a classic "lagenlook" unstructured shape that works with leggings, narrow pants or a long skirt. In case anyone is interested in sewing s...

Alcohol Ink Coasters - for alcoholic drinks of course

Image
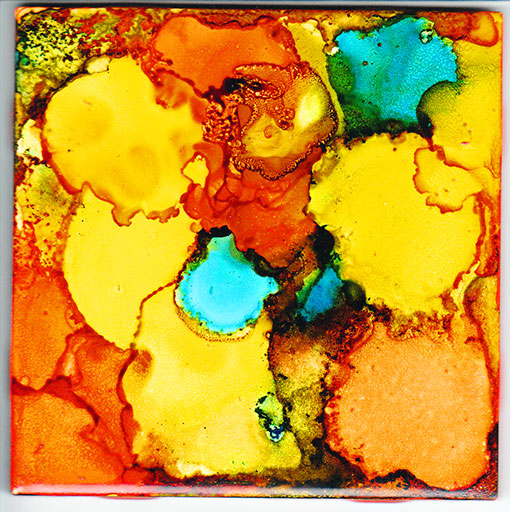
This one is short - and hopefully sweet... You may have seen these – coasters made from ceramic tiles decorated with alcohol inks. They are all over Pinterest and a search with Google Images shows more examples than is comfortable. I saw the original tutorial here:  http://52weeksproject.com/post/29302076841/guest-post-alcohol-ink-dyed-coasters . And I thought it would be a fun little "make" for house gifts around Christmas time. Besides, I had all the alcohol inks left over from updating my kitchen back splash last year. Well, Christmas came and went and it was well into January before I actually got around to having a go. A quick make? Not for me. They took way longer than I expected. There is a lot of waiting around to see what happens, during which time you get to inhale alcohol fumes. And not the good kind either. And then inevitably you have to wash the ink off the tile when the result is ugly and try again. And wait again. I found these hard to make look good! ...

Printing and painting my way into 2013

Image
Wow, I've really slipped in the ol' posting department lately. Not a great way to start a new year. A whole month has gone by! Well, I can partly blame Christmas, partly blame having been sick with this month's very popular bronchial bug (cough hack), and partly blame the fact that I have been busy in the basement. Although I had been hankering to get on with some more garment work, I got pleasantly distracted by a Christmas present - tools for making printing blocks. So I've been carving soft and lino block stamps, setting up a printing space in the basement and generally making a nice mess. Getting Set Up: Setting up the printing space was no big deal. Essentially you need a sturdy table covered with some sort of padding (to make it easier to print on fabric) and plastic. I used a couple of towels for the padding and a vinyl Dollarama table cloth, duct taped tightly around my trusty folding table. $2 for these supplies seemed like the right price. Luckily...

Tiny Birds

Image
Here's the thing about being on sabbatical. Sometimes you can just say yes to a slightly ridiculous notion and run with it. I woke up one morning in December with the idea of making some little felt birds. 3D, fully hand sewn tiny birds.  I've no idea where the notion really came from, but the form of them was pretty clearly worked out in my mind before I even got out of bed. The first one I made was roughly the right shape but way too big. Which is a strange thing to say when you consider that I had no idea what I was making the bird for in the first place. The second one was much (much!) smaller, but too fat and a bit lumpy. The third one, like porridge for bears, was just about right. Patten refined and with tail options,  and with the correct stuffing medium in hand, I started sewing little birds. And sewed, and sewed, and sewed. About  a dozen birds later I had a nice little flock rolling around on the kitchen table. They were colourful. They were funny. ...

Alabama me - part 2

Image
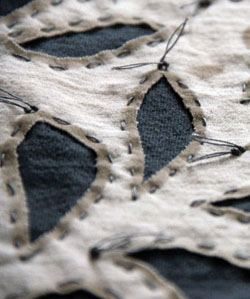
Following on from my previous post, I have also been working on some samples of the appliqué methods shown in the lovely book Alabama Studio Sewing + Design: A Guide to Hand-Sewing an Alabama Chanin Wardrobe by Natalie Chanin. Reverse Appliqué I have a little experience with reverse appliqué - which is when you have two layers of fabric, a stitched pattern and then cut away some of the top layer to reveal the bottom layer. I remember doing some sweatshirts with this, way back in the 80's. Yes, that was in the previous century. So for that reason I didn't do an Alabama Studio style sample of this technique. At right is an example from the Alabama Chanin web site which shows it very well. Essentially, the process is the same as I was discussing earlier, but in this case you cut out some of the stencilled design. Changing how much you remove, how you have done the outline stitching and the colour of the two layers creates many variations that make the pattern be sub...

Alabama me, part 1

Image
This past week I've been quite absorbed by a new book - Alabama Studio Sewing + Design: A Guide to Hand-Sewing an Alabama Chanin Wardrobe by Natalie Chanin. Maybe absorbed isn't quite the right word. Possibly obsessed. Natalie is the founder of the clothing line Alabama Chanin. You can check out the company site here , but you'll actually see a lot more images if you just use Google Images. The clothing is quite remarkable. Although the actual garment designs are relatively simple, they are all completely hand sewn by women in Alabama, made from organic locally grown cotton, and feature a range of embellishments that are stunningly labour intensive. Here's a montage to give you an idea of what the surfaces look like. And these lovely things are every bit as expensive as you would imagine. But in an interesting turn, Chanin has made the clothing potentially available to a wider market by not only selling completely customizable sew-it-yourself kits and supplie...