Inbetween the dots there were rectangles.
I actually didn't plan to blog about this, but the technique was so effective, I thought I'd share it after all...
While working on the red jacket (previous post) I had several side projects going on - something to do when I got tired of sewing all those dots. One of these was working out a way to brighten up the backsplash in the kitchen.
Mark and I had the kitchen redone last year. I love the counter-top stone we chose, which went so well with the existing cabinet. But I never loved the backsplash tile. It looked very good, completely appropriate, and it was the best choice available. It has an interesting detail band with stone and glass mosaics, but it just isn't me. I wanted bright colours, but apparently that just wasn't in style (last year).
Here's what it looked like.
But then I was in Rona or Lowes or something the other day and what are they showing in the tile department? Colour. Lots of it. Which just made me go home and look at the backsplash and sigh all over again.
So I put my mind to finding a way to change the browner parts of the backsplash into something citrusy and cheerful.
My first thought was to paint out some of the tiles in the detail band - but that just seemed too permanent.
My second thought was to find tile stickers in the appropriate colours. I remember seeing these some years ago - a handy product for doing up a tired or rented kitchen or bath. But the tile fellow at the hardware store told me that these were no longer available. There were new peel-and-stick 3D 12x12 tile sheets, but they where all small mosaics, mostly blue and very expensive.
My third thought was how I could make my own stickers. These would have to be somewhat water/steam resistant, non-permanent, easy to cut and apply and ideally semi transparent. I figured the most realistic look would be achieved if one could still see the grain of the stone through the colour overlay.
For any of you who were in the graphic design business in the '80's, you are probably thinking the exact same thing that I thought - Pantone Letra Film!! Oh boy, that was great stuff. Big plastic sheets of pantone colour that were semi transparent, matt and self adhesive. This would have done the job admirably. But alas, that material has long gone the way of the stat camera, the waxer and the dodo.
The good thing about sewing all those dots in the automated way I had devised was that I had plenty of time to think. And what I thought about for a chunk of a day, was how I could make something like Letra Film at home...
The answer to the film part was actually quite easy. A quick trip to Staples and I had a package of clear 8.5 x 11 label sheets for an inkjet printer.
The colour part was a bit more difficult. It would have made sense to just print the colour onto the sheets. Except for the fact that inkjet ink is water based, and so it would not really stand up to life in a kitchen. Also, the colour cartridge on my printer was dried up - as usual.
Acrylic paint was my next idea. I made some samples and the paint gave good colour and but it was either too opaque or it completely resisted on the plastic film, depending on the type. Not good.
Then it hit me. There has been a very popular pin on Pinterest over the past few weeks, usually under the heading of Christmas gifts to make. This pin was about using Adirondak (or homemade) Alcohol Ink on white ceramic tiles to make coasters. You can see one of the original posts about this technique here. If one could float this transparent ink over a smooth ceramic surface, why not do the same over the smooth plastic film?
And it worked very well. I brushed rubbing alcohol onto the plastic label sheet and then washed a few drops of the ink over top. The rubbing alcohol allows the ink to spread well when it evaporates you are left with a very sheer layer of dye.

I made up some samples to test for kitchen use. The resulting sheet was water resistant, but not oil resistant. However, when a coat of matte medium or mod-podge was applied, it became pretty much bullet proof.

 So here's the final effect. It was a cinch to cut rectangles to exactly fit over the brown tiles. I burnished them down pretty throughly, and gave them a coat of matte medium once installed.
And as you can see in the close up, the sheer colour allows the grain to show through, so you can't even tell that these are not actual tiles in the border.

While working on the red jacket (previous post) I had several side projects going on - something to do when I got tired of sewing all those dots. One of these was working out a way to brighten up the backsplash in the kitchen.
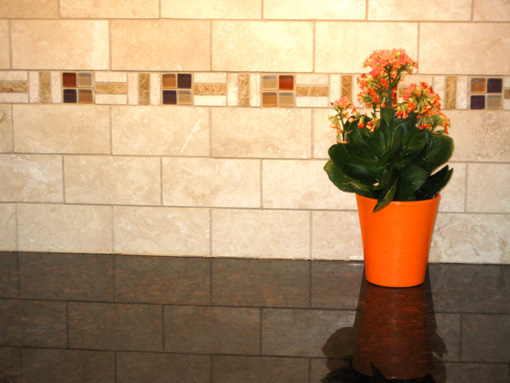
Mark and I had the kitchen redone last year. I love the counter-top stone we chose, which went so well with the existing cabinet. But I never loved the backsplash tile. It looked very good, completely appropriate, and it was the best choice available. It has an interesting detail band with stone and glass mosaics, but it just isn't me. I wanted bright colours, but apparently that just wasn't in style (last year).
Here's what it looked like.
But then I was in Rona or Lowes or something the other day and what are they showing in the tile department? Colour. Lots of it. Which just made me go home and look at the backsplash and sigh all over again.
So I put my mind to finding a way to change the browner parts of the backsplash into something citrusy and cheerful.
My first thought was to paint out some of the tiles in the detail band - but that just seemed too permanent.
My second thought was to find tile stickers in the appropriate colours. I remember seeing these some years ago - a handy product for doing up a tired or rented kitchen or bath. But the tile fellow at the hardware store told me that these were no longer available. There were new peel-and-stick 3D 12x12 tile sheets, but they where all small mosaics, mostly blue and very expensive.
My third thought was how I could make my own stickers. These would have to be somewhat water/steam resistant, non-permanent, easy to cut and apply and ideally semi transparent. I figured the most realistic look would be achieved if one could still see the grain of the stone through the colour overlay.
For any of you who were in the graphic design business in the '80's, you are probably thinking the exact same thing that I thought - Pantone Letra Film!! Oh boy, that was great stuff. Big plastic sheets of pantone colour that were semi transparent, matt and self adhesive. This would have done the job admirably. But alas, that material has long gone the way of the stat camera, the waxer and the dodo.
The good thing about sewing all those dots in the automated way I had devised was that I had plenty of time to think. And what I thought about for a chunk of a day, was how I could make something like Letra Film at home...
The answer to the film part was actually quite easy. A quick trip to Staples and I had a package of clear 8.5 x 11 label sheets for an inkjet printer.
The colour part was a bit more difficult. It would have made sense to just print the colour onto the sheets. Except for the fact that inkjet ink is water based, and so it would not really stand up to life in a kitchen. Also, the colour cartridge on my printer was dried up - as usual.
Acrylic paint was my next idea. I made some samples and the paint gave good colour and but it was either too opaque or it completely resisted on the plastic film, depending on the type. Not good.
Then it hit me. There has been a very popular pin on Pinterest over the past few weeks, usually under the heading of Christmas gifts to make. This pin was about using Adirondak (or homemade) Alcohol Ink on white ceramic tiles to make coasters. You can see one of the original posts about this technique here. If one could float this transparent ink over a smooth ceramic surface, why not do the same over the smooth plastic film?
And it worked very well. I brushed rubbing alcohol onto the plastic label sheet and then washed a few drops of the ink over top. The rubbing alcohol allows the ink to spread well when it evaporates you are left with a very sheer layer of dye.
I made up some samples to test for kitchen use. The resulting sheet was water resistant, but not oil resistant. However, when a coat of matte medium or mod-podge was applied, it became pretty much bullet proof.
And as you can see in the close up, the sheer colour allows the grain to show through, so you can't even tell that these are not actual tiles in the border.


Comments
Post a Comment